Using ESI With Google Sheets
This guide was written for an older version of GESI. For the latest instructions visit the setup instructions on the GESI GitHub repo.
This blog post is part of a series of blogs examining best practices for ESI development. Each blog will be published on the 8th of each month during the journey towards XML API and CREST’s termination date. The legacy APIs will be terminated on May 8th, 2018.
Come May 8th, the death of the XML API will also mean the death of many EVE based spreadsheets. Luckily, with the help of community member Blacksmoke16's GESI, the process for making an ESI based Google Sheet is much more simple than it has ever been. This blog will walk through how to make a Google Sheet to track your character's in-game assets using authenticated calls with GESI without needing to write any code yourself.
Creating a Google sheet and adding GESI
- Go to sheets.google.com and create a new blank spreadsheet.
-
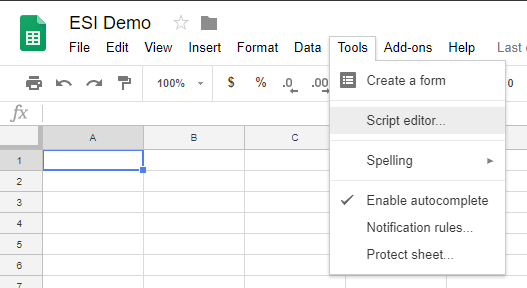
On the top bar of your spreadsheet click on Tools -> Script Editor.
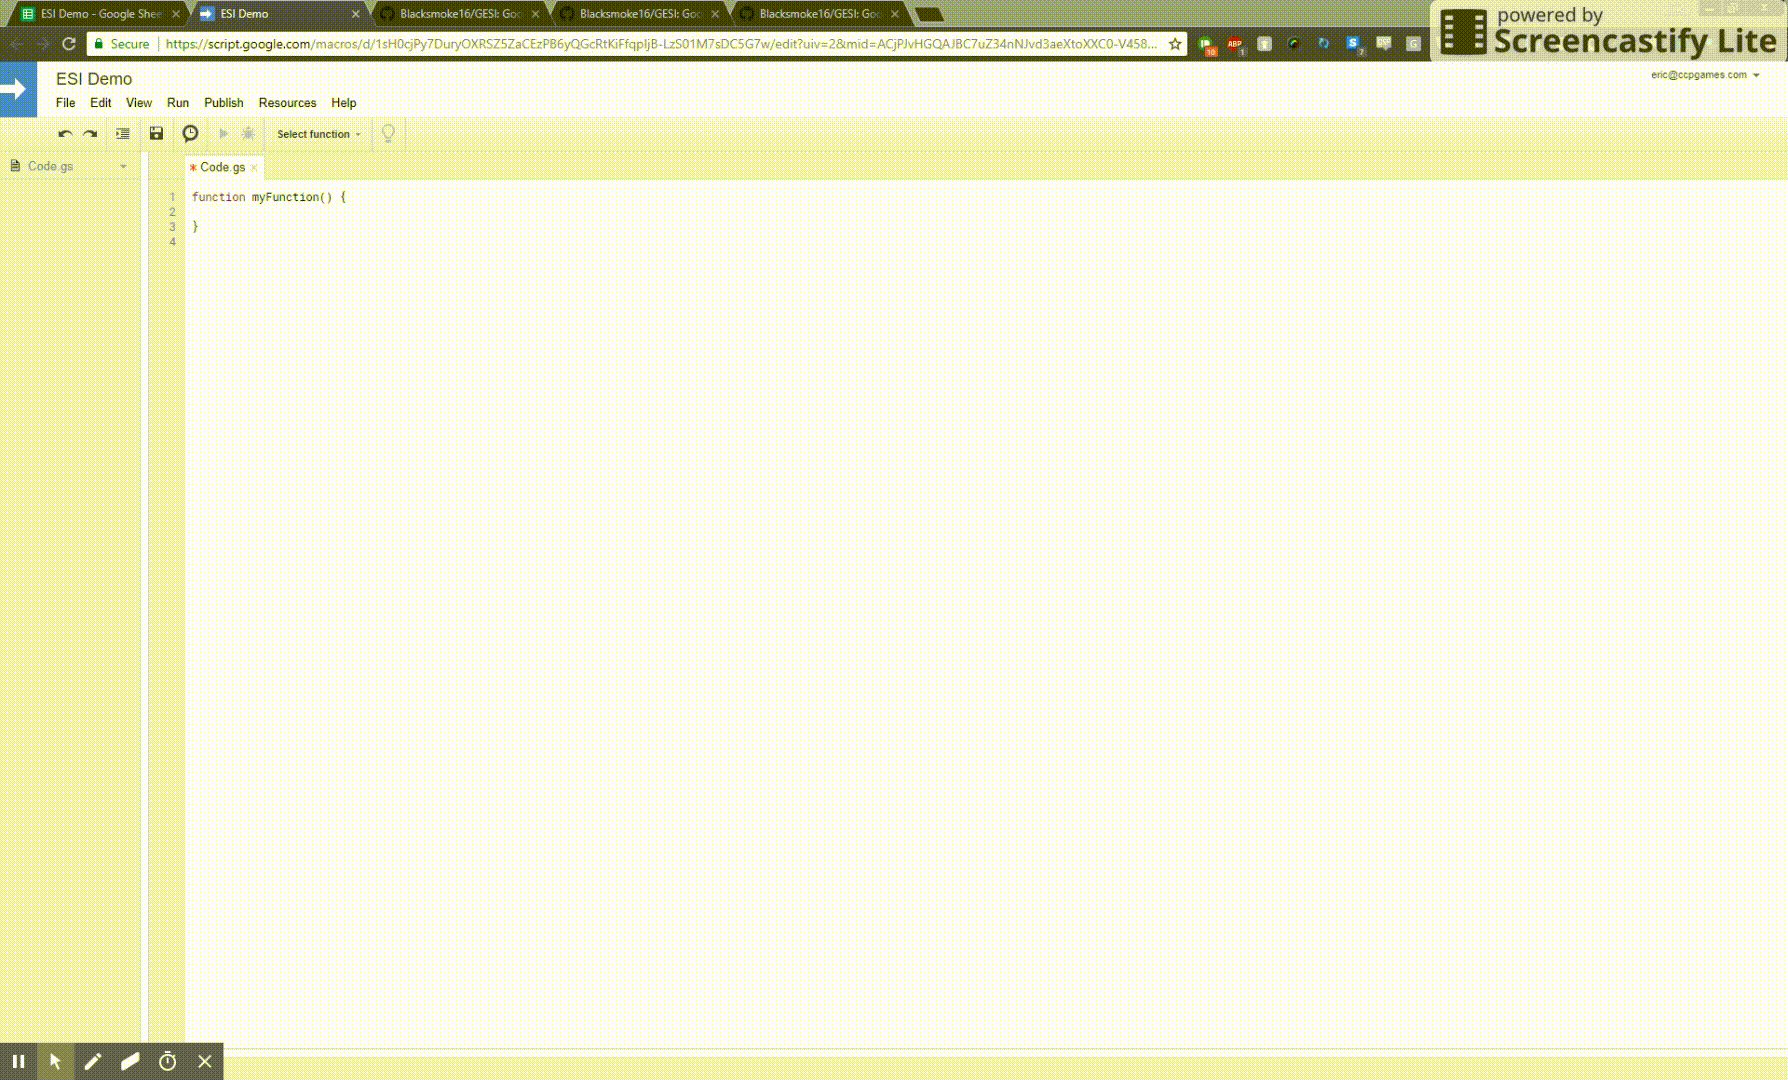
This will open a new tab to an instance of https://script.google.com that is tied to your spreadsheet.
- Navigate to https://github.com/Blacksmoke16/GESI in a different tab and copy the contents of GESI.gs, endpoints.gs, and functions.gs into three different script files in your Google Scripts project.
-
Next, you will have to make an application for EVE's Single Sign On (SSO). ESI uses an authentication method called OAuth2. You don't need to know exactly how it works, but you do need what's called a callback URL for EVE's servers to contact during the authentication process. When using Google Scripts, the callback URL will look like
https://script.google.com/macros/d/{SCRIPT_ID}/usercallbackwhere{SCRIPT_ID}will be replaced with your Google Scripts project's "Script ID". To get this ID, navigate to File -> Project properties:
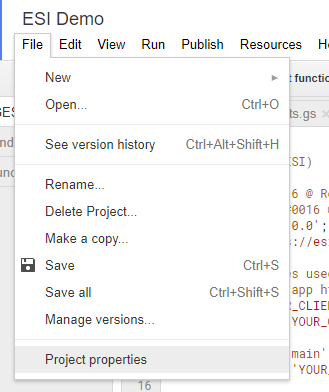
This will open a dialog box with some info about the Google Scripts project, look for "Script ID":

In another tab, open up https://developers.eveonline.com/ and log into your EVE account. Once logged in:
- Click "Manage Applications".
- On the next page, click "Create New Application".
- On the next page fill in the "Name" and "Description" box with whatever you would like.
- Under "Connection Type", choose "Authentication & API Access" which should make a new section called "Permissions" show up.
-
In the "Permissions" section, find the scope
esi-assets.read_assets.v1and click on it. Since all you are going to be doing is looking at your character's assets this is the only scope you want to give permission for. Once you know other authenticated routes you want to use you can come back and add more permissions. The scope needed for a particular endpoint can be found in ESI's swagger spec found at https://esi.tech.ccp.is/_latest/swagger.json Note: if you're using Chrome you can use an extension like JSONView to help make the contents of this link more human readable. -
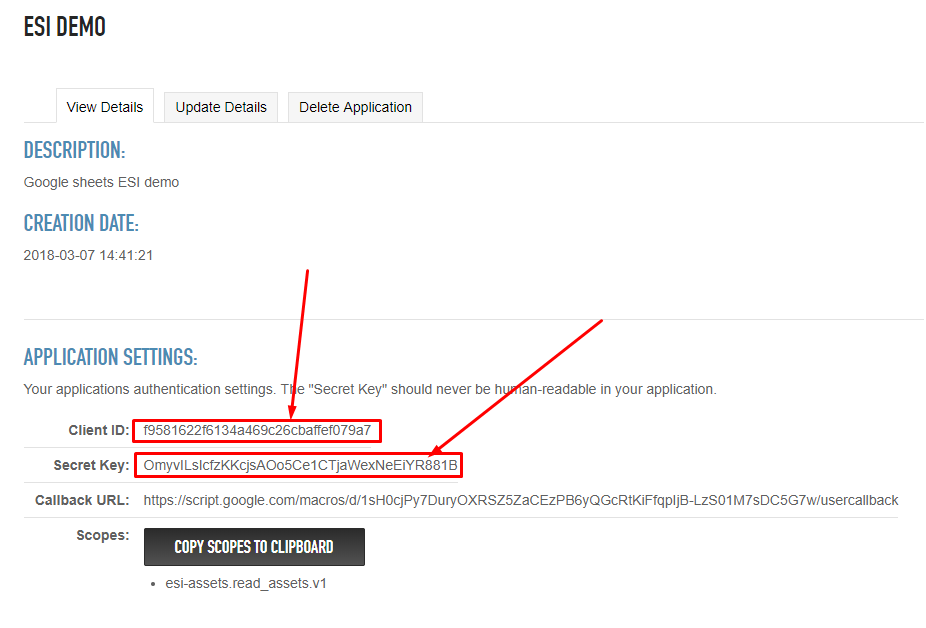
In the callback URL text box, enter
https://script.google.com/macros/d/{SCRIPT_ID}/usercallback. Go back to the tab with your script ID, copy it, and replace{SCRIPT_ID}in the previous URL with your actual script ID. Using the script ID shown in the picture above, the full callback URL would behttps://script.google.com/macros/d/1sH0cjPy7DuryOXRSZ5ZaCEzPB6yQGcRtKiFfqpIjB-LzS01M7sDC5G7w/usercallback - Click "Create Application"
- On the next page, click "View Application" next to the name of the application you just made. You will have to keep this open because you will need the "Client ID" and "Secret Key" for the next step.
Modifying GESI code
In your Google Scripts project you will need to make a few modifications to GESI.gs:
-
Find the following lines:
CLIENT_ID = 'YOUR_CLIENT_ID';
CLIENT_SECRET = 'YOUR_CLIENT_SECRET';
and replace
YOUR_CLIENT_IDwith your SSO application's client ID and replaceYOUR_CLIENT_SECRETwith your SSO application's secret key.It is important to remember that if anyone gets your client ID and secret key that they can make calls on behalf of your character. In this case, anyone who has access to your Google Sheet will be able to see this secret key so make sure to not make your Google Sheet public. This is also why it's important to not choose all scopes that are available when making your SSO application.
-
Find the line:
MAIN_CHARACTER = 'YOUR_MAIN_CHARACTER_NAME';
and replace
YOUR_MAIN_CHARACTER_NAMEwith the name of your main EVE Online character. -
Find the line:
-
Find the lines that look like:
SCOPES = [
    "esi-alliances.read_contacts.v1",
    "esi-assets.read_assets.v1",
    "esi-assets.read_corporation_assets.v1",
    "esi-bookmarks.read_character_bookmarks.v1",
    "esi-bookmarks.read_corporation_bookmarks.v1",
    ... // This denotes a continuation of this array
];
and remove all scopes except for esi-assets.read_assets.v1 to match your SSO application. SCOPES should look like the following when you are finished:
SCOPES = [
    "esi-assets.read_assets.v1",
];
You will need to add any scopes here that you add to your SSO application as well.
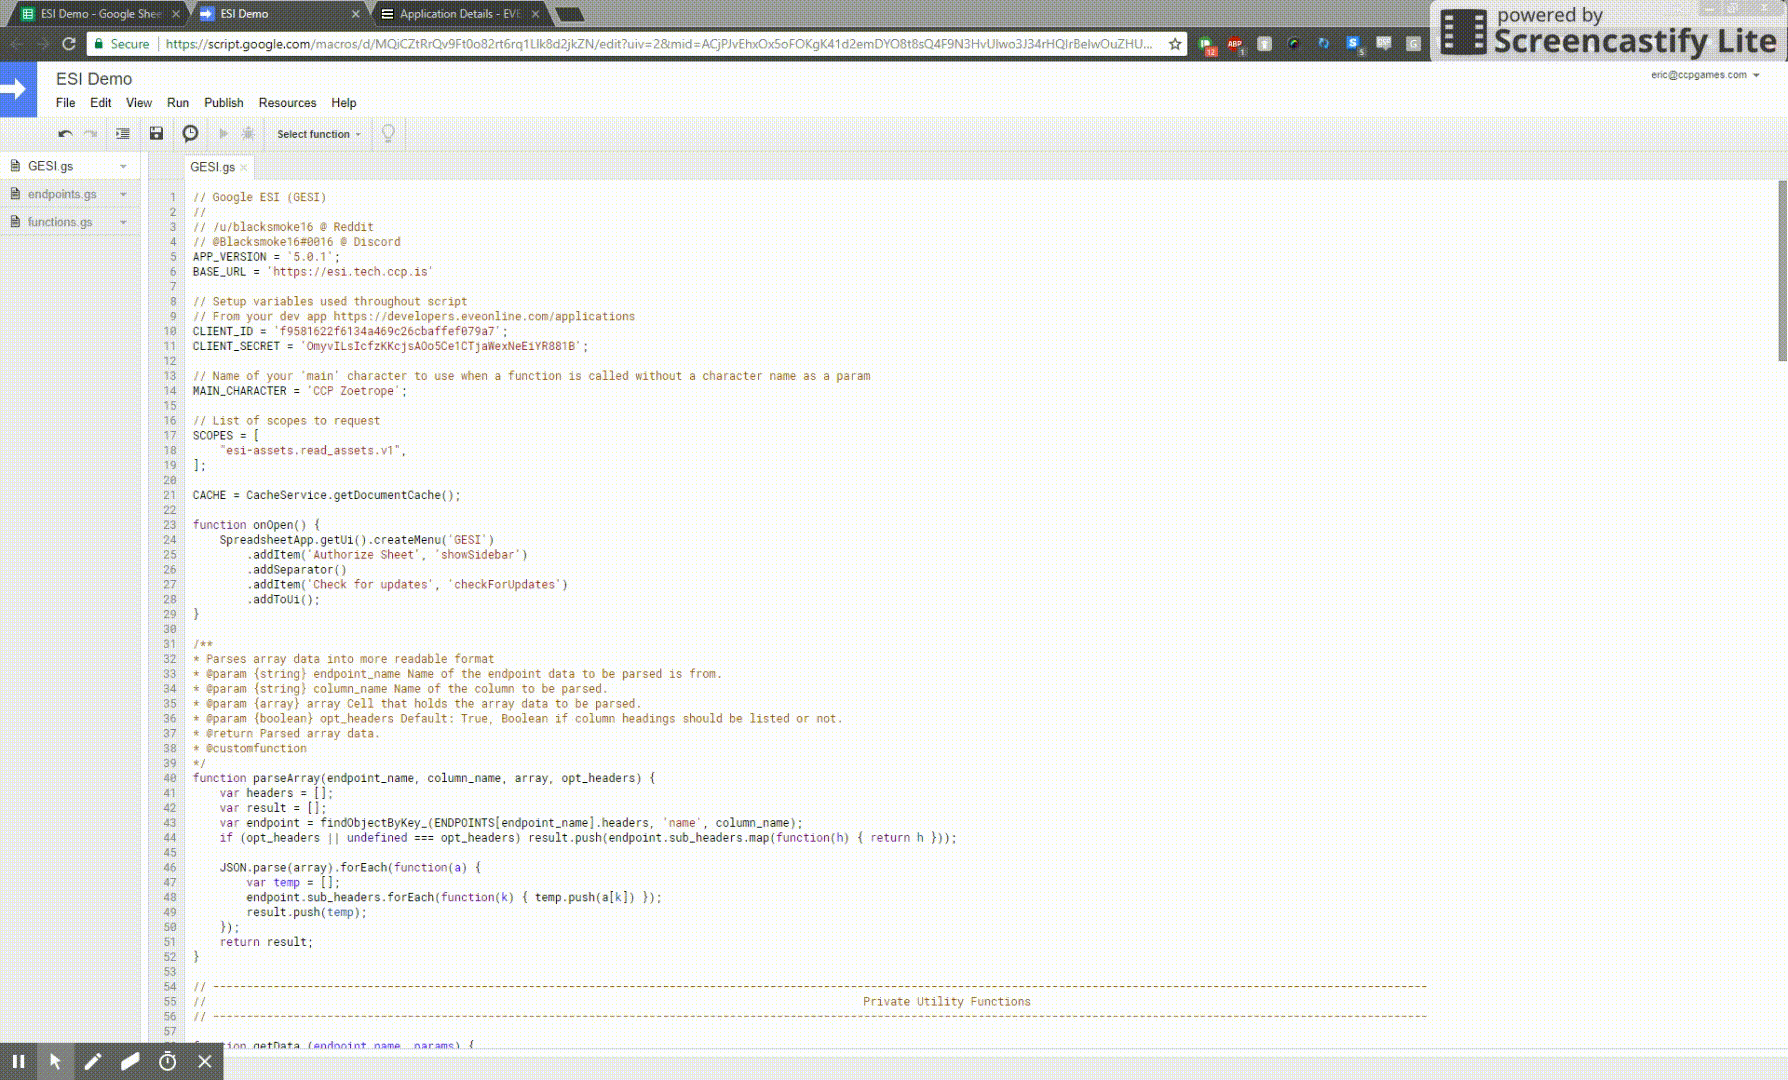
When you are finished with the previous three steps the top of GESI.gs should look similar to:
// Google ESI (GESI)
//
// /u/blacksmoke16 @ Reddit
// @Blacksmoke16#0016 @ Discord
APP_VERSION = '5.0.1';
BASE_URL = 'https://esi.tech.ccp.is'

// Setup variables used throughout script
// From your dev app https://developers.eveonline.com/applications
CLIENT_ID = 'f9581622f6134a469c26cbaffef079a7';
CLIENT_SECRET = 'OmyvILsIcfzKKcjsAOo5Ce1CTjaWexNeEiYR881B';

// Name of your 'main' character to use when a function is called without a character name as a param
MAIN_CHARACTER = 'CCP Zoetrope';

// List of scopes to request
SCOPES = [
    "esi-assets.read_assets.v1",
];

... // This denotes continuation of the file
Make sure to save GESI.gs when you're done.
Authorizing your spreadsheet
If you followed the previous steps correctly you should now be able to authorize your EVE account inside your spreadsheet!
Navigate back to the tab with the spreadsheet in it and reload the page. Upon reload and after waiting a bit you should see the option GESI appear on the toolbar on the top of the page. Click GESI -> Authorize Sheet which should open up an alert saying "Authorization Required". You will need to authorize the scripts that were made in Google Scripts to work for this spreadsheet.
Clicking "Continue" in the alert will open up a new browser window with a warning saying "This app isn't verified". This is because the scripts you are using have not been uploaded as official Add-ons for Google Sheets so it has to make sure you can trust the scripts you are about to run. Continue on by clicking "Advanced" and then clicking "Go to ESI Demo (unsafe)". The next page will list all the things that Google Scripts is asking permission for. This will all look similar to the following gif:
Click "Allow" which will bring you back to your spreadsheet and display a dialog box with a link titled "Authorize with EVE SSO".

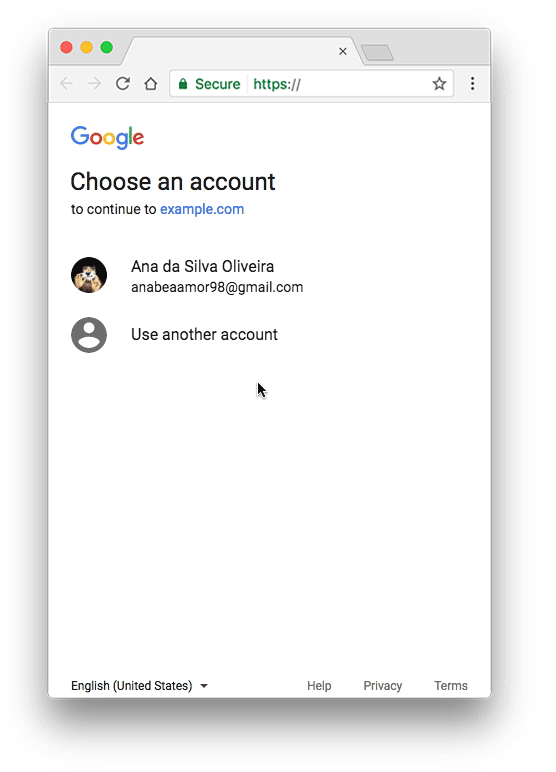
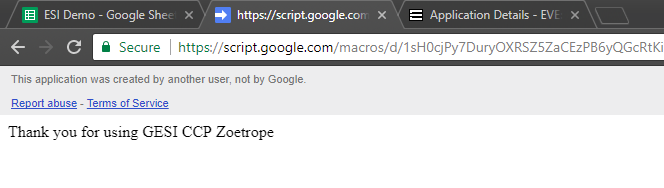
Once you click the link you will be routed to the EVE Login page where you will be prompted to log in. Once logged in, choose a character from the drop down and then click "Authorize". If everything was successful you will be routed to a blank page with the words "Thank you for using GESI {your character name}" where {your character name} will be replaced with the actual name of your character.
You can close this tab if everything was successful and go back to your spreadsheet where you can now work with your assets!
Getting your character's assets in your spreadsheet
The route you will be using to get your character's assets is https://esi.tech.ccp.is/v3/characters/{character_id}/assets/. You can navigate to https://esi.tech.ccp.is/ui/ to browse through all endpoints available in ESI and you can click here to see the character assets endpoint specifically.
Now that you know what route you want to use go back to your Google Scripts (Tools -> Script editor) and open up endpoints.gs. In there, press Ctrl+F to bring up the search box and search for "/characters/{character_id}/assets/". This will bring you to a JSON object named characters_character_assets which will be the name of the function you will use in your spreadsheet.
Now that you know the name of the function to use in your spreadsheet you can head back plug it in.
Go to cell A1, type =characters_character_assets() and press Enter. After a bit of loading, you should see your spreadsheet be populated with data about your character's assets.
ESI only returns ID's for a lot of endpoints so you will see a list of type IDs representing your assets. You will need to take these type IDs and plug them into another endpoint to get details about each one. The endpoint you will need to use to get the name and description for a type ID is /universe/types/{type_id}/. You can use the same method explained above to find the name of the function you will need to use in your spreadsheet for this endpoint. After looking at endpoints.gs you will find that the function name is universe_types_type.
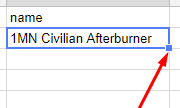
Go to cell H1 (or whichever column is blank after your asset's data) and enter the text "name". In cell H2, copy and paste the following function:
=HLOOKUP("name", universe_types_type("en-us", INDIRECT(ADDRESS(ROW(), 1)), True), 2, FALSE)
and press enter. It is left as an exercise for the reader to figure out how this function works exactly.
After hitting enter you should see the name of the type_id at the beginning of the row show up. Hover over the bottom right of cell H2 until drag down until you have covered all the rows of your asset data to apply this function to every row.
Follow the same process used to get the "name" of the type_id to get the "description" using the following function:
=HLOOKUP("description", universe_types_type("en-us", INDIRECT(ADDRESS(ROW(), 1)), True), 2, FALSE)

You should now have a spreadsheet that allows you to keep track of your character's assets!
Conclusion
Spreadsheets can be a fun and familiar way to explore ESI's data and thanks to the pioneering efforts of both Steve "Fuzzysteve" Ronuken and Blacksmoke16 it is now much easier to do!
Keep in mind that Google has a limit on how many requests you can make from a spreadsheet per day. If you need something more complicated than is allowable then pick a programming language and try and build your own application!
As always you can chat with us and our helpful community on our #esi slack channel
o7
-- Team Tech Co.
Appendix
The following routes have been added or updated in ESI since the previous blog:
New versions of existing routes:
- GET /latest/corporations/{corporation_id}/structures/ (v2)
- GET /dev/corporations/{corporation_id}/containers/logs/ (v2)
- GET /dev/corporations/{corporation_id}/blueprints/ (v2)
- GET /dev/characters/{character_id}/notifications/ (v2)
- GET /dev/corporations/{corporation_id}/assets/ (v3)
Bumped routes:
- GET /v2/characters/{character_id}/orders/ (dev -> latest)
- GET /v2//corporations/{corporation_id}/orders/ (dev -> latest)
Removed routes:
- PUT /v1/corporations/{corporation_id}/structures/{structure_id}/
Get a sneak peek at what's coming to ESI by watching our deployment timeline.
New to ESI? Check out our ESI quick reference.
Migrating from the XML API? Find equivalent ESI endpoints to the XML API.
Migrating from CREST? Find Equivalent ESI endpoints to CREST.